What about Gynzy?

Standard

Gynzy

Gynzy is a nice alternative to the Smart Note app that comes with the Smart Board. It is better designed and more intuitive than its counterpart . The distinct tabs, the icons, and the clean interface really make it easy to use. Another thing that  facilitates its learning is that Gynzy publishes its own tutorial videos within the program,  therefore there is no need to look for them on the internet.

Gynzy

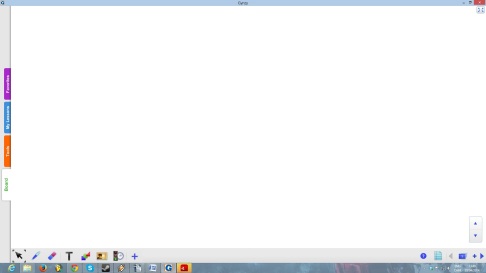
Even so, Gynzy does not copy all of the elements found in Smart Note app. I am especially talking about the flip tiles, the balloon pop, and these kinds of interactive icons which are quite useful. Nonetheless, Gynzy pretty much includes the important tools needed by teachers: the timer, the text zone, the pen, the highlighter and so on. There is also an option in the additional content, the ‘+’ icon, that allows you to write on your computer screen.

To get started, you need to go to www.gynzy.com, create an account, and log in. As you do so, you will get a six-month free trial, but then it will cost monthly or annual fees depending on your needs. You may choose between a single-user price and  a school price.

Why pay for this program? Because everything is clear in Gynzy. You won’t hurt your head trying to figure out how to do things. Simply by looking at the few icons, you should understand what they mean right away. For example, the shape icon is to add shapes, the clock icon is for timers, the lined sheet icon is to add lines to your board, etc. The only tricky part is the two ‘+’ icons. The first one is to see more options and the second one is to add a new blank page.

You can import images, videos, and audio tracks from Google, Youtube, the Gynzy library, and from your own hard drive. If you wish to import your lessons, you can put them in PDF format and import them. All it requires is to download the desktop add-on for Gynzy.

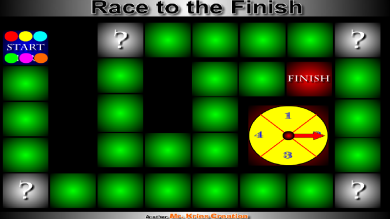
What is new and truly innovative about this app is all the pre-made lessons and tools it includes. On the tool tab, you may search for activities according to your field of teaching. Once in a category, you may search the list of suggested activities and tools for anything you might like or type in the search bar to find something you already have in mind.

Once you have created an activity in Gynzy, you can save it and classify it in different folders under the tab ‘My Lesson’. You may then add them to your ‘favourites’ to have quick access to them.

Gynzy is a useful, simple app and I recommend it. If you want to have your colleagues enjoy the app with you,try convincing your school to pay the annual fees. Take a look at the free trial and judge for yourself, enjoy!

Edmodo

Standard

You are a teacher? You are looking for an efficient new way to organize your classroom planning and homework system? Edmodo is a must in what regards to including technology to teaching. It is a website mimicking Facebook with a pedagogical optic. The objective of the software is to provide teachers with a functional platform helping them share any relevant information with their students, may it be: homework, discussions, files, schedule etc. As mentioned above, the program as a Facebook-like interface. This is a great thing since most students are already familiar with those kinds of settings. Want to know more? Go to www.edmodo.com/ and start bringing your classrooms on the web!

The first step is to create an account. This is as simple as it gets. Write your name, your email address, your password, and there, it’s done. Now just set up your account the way you like it. If, for example, you are teaching three classes, create three groups identified by their number or their grade in Edmodo, and create files in them to sort your uploaded files. In these files, for each of your groups, you can put links, embedded videos, audio track, or upload files from your computer and even from your Google drive.

The second step is to have your students join the group. To do so, have your students create an account. What is nice is that they are not forced to register their email address, although if they do, it will enable you to post ‘alerts’ on Edmodo which are sent to their emails. The only thing that is required of them is there name (which can be pseudonyms) and to find their teacher page. To simplify their research, simply click on the group’s folder. This will show the URL of your Edmodo page, which you shall give to your students. Once on your Edmodo page, the students will need there group’s password to be allowed to enter it. You will find the password of your students’ group in their group’s folder, next to the URL you already gave them.


The third step is to put content on your Edmodo page. If you look at the tabs one by one, you’ll find many interesting features suggested. For each group you have the Note, Alert, Homework, Quiz, and Survey tab pm the top of the screen. On the right, you will see some other tabs for the additional apps that can be merged with Edmodo. Edmodo planner will obviously be useful. It is a calendar already installed on the website which allows you to plan and let know your students what is coming for the year. As you search in the Edmodo store, you will find many additional apps either for some fees or for free. Some examples of these apps are a photo editor, a revision-card app, a lesson-suggestion app, and the list goes on.

For some ideas on how to use Edmodo in your classes, see the video below.


Drop it in the Box

Standard

Another great tool to add to your teaching toolbox is Dropbox. It is a fast and easy way to make backups, gather work, and submit them to the teacher. It is free, easy to use, and very useful.

First, go on www.dropbox.com and create an account. Then, select the free option to gain a free two-gig of only storage, also known as ‘the cloud’. You can also pay monthly fees of 9,99$ per month to gain access to more storage space or 15$ per month for enterprise purpose. For teaching purposes, the free version is recommended.

Once you have selected the version that suits you best, the program will automatically download and you simply need to install it on your computer. After having successfully installed the program, the Dropbox icon will appear on your office. From now on, drag file onto the icon to integrate them to your Dropbox files. They will then be accessible from anywhere you have access to the internet.

To gain access to your Dropbox files, go on the Dropbox website and log in. They will ask you to validate your email address, do it you will see the files you have put on Dropbox show up. On your main page you will see six tabs: Files, Photos, Share, Links, Events, and Get started which is a tab to gain additional storage for completing some tasks like sharing files and inviting people to use Dropbox.

Students may share their folders with peers for teamwork. This is an excellent way to have your student work together without requiring them to actually meet and spend time together, which is not a bad thing, but can become complicated depending on their agenda. The sharing is done via email address. Simple click on the folder you want to share and click on the tab ‘invite to folder’. The person to whom you share to obviously also need a Dropbox account in order to receive the invitation. Once people received access to your files, you can always kick them out or give control of the files to anyone amongst them.

One thing people who share work on Dropbox must be aware of, is that if anyone of them go on their Dropbox icon and drag the shared file to their computer, it will disappear from Dropbox. This means that your teammates won’t have access to it anymore, so be wary how you use it and with who you use it.

If you want to share files with your students, but you don’t want to get into the process of having them all install the Dropbox software on their computer. You can simply right click on your Dropbox file from your office, click on Dropbox, and Get Link. This will open your browser and give you access to the link of the file. Then, copy it and send it by email and your students. They will receive it even if they don’t have Dropbox. They will be able to see the file and even download it.

Dropbox is also available for mobile devices, but some peculiar extensions may cause problems and have compatibility issues with it.

You may also create a big internal network where all the computers have access to the files in Dropbox. This may be useful with students when it comes to working at the computer lab or with the Ipad if your school have them. 

Flipboard in ESL Teaching

Standard

Social media is an amazing way to gather information apart from newspaper, radio, and television. They are popular because they are accessible from almost anywhere, at any time, and they allow the readers to express themselves.

In this regard, Flipboard is an application that gathers many topicalities on the web and allows you to subscribe to anything you like at the tip of your finger. As an ESL teacher, this platform can become quite handy when it comes to reaching students interests. The choice of topics is almost endless and the number of articles per topics is just as great. You can even use this software to have your students publish their findings, which is at least a bit more motivating than handing in paper copies to the teacher.

How does it work? It is simple. First, you download the app for the platform you need it, either it is for Ipad, Iphone, Blackberry, or Android. It was not developed for PC or Mac users, so if you want to get it for you desktop or laptop you will need an app player installed. Next, get started! Open the application and see what it suggests you to read.

To begin, you will find many categories that Flipboard pre-organized for you in clickable squares: Cover Stories, Actuality, Economy, Facebook, Twitter, Technology, Flipboard picks, Sports, and Inside Flipboard. If these categories do not reach your interests, you simply have to click on the red ribbon on the top right corner of the screen or scroll down until you reach the last square called ‘More’. There you have many more categories that can suit any type of person.

So as you will be showing your students how to get comfortable with the app, have them subscribe to some categories they will find interesting or that you believe will be useful for their work.

Your students will have the possibility to synchronize their Flipboard app with some social media such as Facebook and Twitter. This is a great thing for everyday users since it brings everything at the same place on a single app, but for teaching purpose it might just distract students from their work so I wouldn’t recommend it.

To gather all their information sources on the same square, have your student create a magazine, this can even be the purpose of their project. To create a magazine, all the students have to do is to create a Flipboard account. Once they have it, when they’ll be searching for topics either on the search bar or the pre-organized category squares they can press the ‘+’ button to add an article to their magazine. Once it is made, they can share their magazine via Facebook, Flipboard, Twitter, or by email.

That’s it. Now your students have a lot of information right in front of them. They can subscribe to different topics and create their own magazine. If you have access to Ipads in class, this is an ideal way to reduce the amount of time lost by moving to the library and searching for books. Plus, it has a much wider range of information available than a limited school library.

To pad or not to pad

Standard

The Ipad is a convenient tool to work with in a classroom, especially in the field of ESL teaching. It can replace both paper products and the computer labs. With it, students have access to digital content including books, course notes, videos, songs, websites, games, images, etc. Instead of buying books and having to take notes in a notebook, with the Ipad, students can read these directly on their tablet, this allow the students to carry many books, course notes, and much more in a single object. No more excuses saying they forgot to bring their material! The Ipad stays in class on its charger, and ultimately the students would only need to bring their socks and shoes to class. The Ipad helps saving a lot of paper. Spending less time taking notes means spending more time listening to the teacher, well, in theory. The teacher still needs to be motivating and interesting, but with the combination of a Smartboard and Ipads in class this is far from impossible.

Still, note taking and reading, even on a tablet, are very similar to regular teaching. What else can you do with this new tool to improve your students’ participation, and in the end, their ESL mastery? To me, the most distinct feature of Ipads and Androids are their creative applications. It is now so easy even for young students to write a song, record it, edit it, put effects on it, and add a random music behind. This is but one example; they could do just the same with a video. They could start by writing a story, then add the dialogs, find some costumes, find a room, tape themselves, and edit the video. There are more and more of these kinds of apps that are easier and easier to use. Technology is not to be feared anymore, it is getting very user friendly.

On this link you can find over a hundred applications that can be used in a classroom environment and instructions on how to use them. One of my favourite is called Strip Designer and is a comic creation application. Simply import pictures, chose their disposition, add text, and bingo! You can have your students create great projects based on various themes with this kind of nice tool.Image

Also, Evernote is a cool application too for students who have access to an Ipad. Basically, it is a virtual agenda where you can create notes to yourself about upcoming events, photos, videos, documents, and audio tracks that you want to keep. Once a note is created in Evernote, it can be classified to keep your tool tidy. What is interesting about this application is that it can be synchronized to all the devices, whether it is a cell phone, tablet, laptop, or desktop computer. The students can also share your notes with their contacts, so the work they do in Evernote is reusable by the others.


Classroom Environment

Standard


You will be most pleased by today’s new discovery in the field of ESL. In fact, the website I am about to eulogize may be useful to any teachers, especially at primary level. This website is called http://www.teachers-tools.com/. The type of tools to be found in this link is not the type I am used to talk about. In truth, it is a, online shop, but a very interesting shop for teachers who desires to embellish their classroom.


ImageFirst, once on the main page of the website, you will find seven tabs to choose from. These tabs are: Decorative, Shop by Color and Theme, For the Classroom, Shop by Subject, For the Home, Games & Toys, and Children’s Literature. Basically, teachers-tool.com sells bulletin board material. The first tab, Decorative, will allow you to search throughout many pieces of add-on for a new fashionable bulletin board. It will also give you access to the posters and calendars sections.


The second tab, Shop by Color and Theme, will propose you diverse pre-made theme for you school board bulletin. It allows you to choose piece by piece the sections of the bulletin board that interest you.


Image

The third tab, For the Classroom, is for buying supplies and teaching material, which is less interesting since parents are in charge of the material and, most often, the school decides which books to buy and. However, the sections, Organization and Student Recognition, are very interesting. In Organization you will find plenty of useful teaching tools such as: folders and furniture, pocket charts, cards, nameplates and nametags, library pockets, and hall passes. Even more interesting, in the Student Recognition tab, you will find a bunch of fun things to give to your students to encourage their good wills. You will find stickers, stamps, certificates, birthday cards, toys, and the coolest of all, the treasure chests!

Image


The other tabs are less useful, they are a mix of toys and books for students, but the attractive part of this website is about what you can use in your class to make it a more attractive environment to learn and prosper. For anyone who is willing to put a bit of money into his/her classroom appearance, this website is amazing. And just like the mechanic must provide his own tools, a teacher should be able to get his/her hand on some tools of his own.


Studies have shown that developing a nice environment for the students will greatly improve their performance, motivation, and attention in class. This is not to be taken lightly; the future of our offspring depends on it. Adding cool posters, nice bulletin boards, attractive pocket charts, and attractive items and reward that look like artefacts may be the little kick that will allow the students to fully develop their potential in class.


Fun & game in learning

Aside

In the everlasting quest of searching for the best English teacher’s tools, I ended up finding this website: https://www.superteachertools.net/. Not too hard to find, you will tell me. True, it is the first website popping up on Google when typing ‘teaching tool’. Regardless of this, if you have not yet heard of this website, you may find it quite amusing and interactive. Superteachertool.net provides up to 10 simple tools from the Smart Notebook software, without requiring having it installed. From reviewing games to useful class management tools that you can use on a Smart Board or with a projector, you will find something of your liking on this website. With this you will be able to capture students’ attention with the hypnotising powers of the screen.

The tools you may find on the website are: Jeopardy Style Review Game, Who wants to be a millionaire?, Speed Match, Board Game Review, Seating Chart Marker, Group Marker, Random Name Generator, Classroom timer and Countdown, and QR Island.Image

I am not going to go through them all. I will focus  this article on the Board Game Review. It is a nice tool to get you out of trouble if you end up really not knowing what to do with those 15 minutes left to your class. In such case, simply start the game and choose from a range of online premade quiz with to test your students’ general knowledge. You can even download them to use it without needing an access to internet. If you want to use it in a more serious way, you can create your own Boarding Game Review and adapt it to the content you have been teaching. Also, you can edit any file available on the website as you wish. To do so, just click on the Board Game Review icon in the middle of the main page, select the option you want, either Download (to download the Flash game on your PC or Mac), Make a New Game (To create your own board game review with the questions of your choice), Game Library (to gain access to the downloadable versions of the available games), Play Online (to simply play the variety of available games without any download required, How to (to learn how it works), or Contact (to contact the host). If possible, I strongly recommend playing online, it makes things much simpler.

The concept is simple. Once you have selected the game of your choice, you will always see the same board. On it, there are coloured, movable dots that represent each team. When you click on a square a random question pops up. The answer will appear by clicking on the ‘show answer’ button. Clicking on the yellow circle will make the arrow spin and stop on a number from 1 to 4, determining the number of square the answering team may advance if they successfully find the right answer. If a team falls on a question mark square, a random consequence, either good or bad, pops up. Basically, it is a race to the finish line.

Have fun exploring the diverse tools at your disposal on Superteachingtools.net.

Between Heaven and Hell

Standard

With all the shiny bright colors now available, thanks to the rise of LCD and plasma technology, kids are now overexposed to audio-visual stimulants. TV shows and video games, in order to keep up with the new needs of youngsters, have adapted their products to be suitable for a more and more hyperactive generation.

Image

ImageStuck between boredom at school and overwhelming brain excitement at home, kids must still manage to concentrate on what the teacher in front of them is desperately trying to get into their head. Prescribing Ritalin to every child may not be the social choice to make to get children to pay attention in class. Sometimes, all it requires is some creativity and adaptation. How can teachers get their students to listen? I suggest giving them what they want!

A good way to keep children’s interest is to show them videos that are short and sweet. This is where YouTube becomes your best friend. This handy tool is an amazing data base with a wide range of videos to choose from that can suit every teaching situation. English teachers are particularly pampered since they may pick almost anything on the web and turn it into teaching material: “As English teachers, sky is the limit” (Miller, 2014). Want to enrich students’ space vocabulary? Have them watch a documentary on Mars. Want to teach the difference between two verb tenses? Have your students listen to a song switching between the two tenses.

ImageIdeally, length of the videos should not go beyond twenty minutes. Passed that point, you will have lost almost everyone’s attention. Even better, try to show them many two-to-five-minute videos on the same subject instead of one long, this will reignite their interest. Plus, if you want to have time to explain the subject and do exercises, you should consider keeping spare time to do so.

A side of YouTube that is not well-known by the public is its education section. Once on the website, you will find six suggested categories of videos on the left banner. They are: popular videos, music, sports, video games, education, and movies. The education section is subdivided into nine subsections: Primary & Secondary education, University, Lifelong Learning, Social Sciences, Mathematics, Engineering, Science, History, and Arts. Throughout these subsections you may find crash courses, documentaries, conferences, lectures, etc. Most of this content would not be appropriate for viewing in class, but may inspire you for your next lesson.


To conclude, try making students feel like they are having fun, even if that is not really the case.  As long as they believe your classes are a bit entertaining, they may put some effort into it. They may even show up more often in class.

A test maker? Why would I need a test maker?

Standard

As an English teacher, just like in any other domain, you will have to create your own tests at some point to evaluate your students. To do so, you can use a simple word document and write your questions on it, or, what I suggest you, is to use an on-line test maker.

The one I will talk about today is called Easy TestMaker. The reason why I chose this test maker among the numerous available on the web is quite simple: its name bears the word “Easy”. After having tested the functionalities of the test maker, I agreed with its developer or developers and I confirm that this tool is user-friendly and easy to use. Now let me explain you how it works and how it can save you time when preparing a test.

ImageFirst step, go to http://www.easytestmaker.com/. Then, create an account. You can either pay a monthly or annual fee to have access to additional features, but first, I will focus on what you can do with the free version of the test maker and explain its additional features later on. Once logged in, you will face an empty page with some options on top of the screen. In the future, this empty page will hold the list of all the tests you will have created.

For the moment, the only option you have is to click on “Create New Test”.  What makes this website so easy to use is that there are not many options available. This can be seen as a good or a bad thing, but for the purpose it serves, that is, to create exams, I think that the simpler the better. So now that you have clicked on “Create New Test”, you will find the heading section and all the types of question that are possible to create with this tool on the left side of the screen: section heading, short answer, multiple choice, true or false, matching, fill in the black, and copy question. Click on whichever you want and follow the steps on each tabs. The only problem I have had with this is that the grading for each question will not appear on the questionnaire. If this is an issue to you, you can always write the grading as a signature in Adobe Reader once the final version is converted into a pdf file. Once saved in your list of tests and exported into Adobe Reader, you can print your tests and distribute them to the students.

If you wish to have an on-line version of your tests for students to have access to it from the computer lab, it is possible, but sadly, you will have to pay. This is one of the additional features that are not included in the free version. To have access to the additional content, there are two  types of subscription to choose from. Both are annual payments. The “Plus Edition” is 35.00$ and does not add much content for the price. Merely an access to folders to classify your tests and some customization for font. The “Premium Edition”, however, enhance the account to a much more interesting level. Basically, for 60.00$, it unlocks the possibility to import images in the test and to publish your exams on-line to have your students do them from the computer and get their marks instantly.

Also, this kind of tool may save you some time. Rather then wondering how to align borders and how to space things in a word document, the software will do it for you. Furthermore, if you wonder which kind of questions to ask, having a visual support of different question types is helpful.

To conclude, the purpose of this blog was to initiate you to the concept of test makers. There are plenty of them available on Internet. It is up to you to decide whichever suits you best. The Easy TestMaker is probably not the best test maker, but it is a good one to start with to see if you enjoy this kind of tool.


When social life meets professional life

Standard


employee            facebook-drunk-docs              Boss                                                   

Nowadays, Facebook is a widely used tool. People use it to chat, keep in contact with friends, share their thoughts, and share photos, videos, and music. Another way to use Facebook is to create a group to communicate with people at work. In the case of an ESL teacher, this may appear like a good way to keep in contact with the students and post the latest news from the course plan.

It is indeed very useful to have access to all these commodities on a single website.  Sadly, it is a double-edged sword. How many stories have you heard of people getting in trouble because of the use of Facebook? I bet you did at least hear one of them. Was it true? Was it false? It does not matter, the question you should ask yourself is: could it happen to me? If your answer is yes, read this carefully it might interest you. If you answered no, think again, harder, and more seriously, because that was the wrong answer.

There are many reasons why Facebook is dangerous for your career. In the case on ESL teachers at elementary and high school level, things get even trickier since they have a role of authority over minors.

First, whatever your security level is set on, there will always be people who have access to your profile. These people can act as spies as they wish and disclose information about you that you might consider undesirable to expose. In other words, you do not have control about what people say about you on Facebook, especially when it comes to cruel students who want to annoy their teachers.

Next, you also have no control over who publishes photos of you. Without knowing that a photo of you even exists, it may already be on Facebook with your name tagged on it. When this happens, there are two main possible endings. Either your friends comment on it, you have a nice time, and you keep the photo in your album or it is an embarrassing photo, you wish to destroy evidence of its very existence, and you do not know how to deal with that so-called friend or the student who brought this on yourself.

ImageStill, there are some ways to prevent all these unwanted situations. Create a separate Facebook for work and keep it professional. Also make sure that spies won’t have access to your personal Facebook too easily. To do so, change your name, don’t put a photo of you on your profile or your banner. Also, you can simply clean your Facebook friends once in a while to ensure that your friend list is up-to-date and contains no people with bad intentions against you. Trying to keep your self out of the mess is always a good idea too.

To conclude, to use or not to use Facebook to work with your students in a private group is up to you. Well-managed it can be a good add on to your teaching tools. As long as you do not friend the student, you won’t access to their personal information (which can be a burden to be aware of) and nor will they. in short, the simple use of Facebook is dangerous, either use it wisely or do not use it at all.